

Together these are the difference between “Composer keeps rewriting my app” frustration and “I fixed this one button in 10 seconds” delight.
Inspect Component
What it does
In an app of any meaningful complexity, you’ll often want to change a specific element — not “the chart” but that chart. Describing position works (“the donut chart in the top-right”) but breaks down once the layout has many similar components. Inspect Component turns a click on the preview into a precise element reference Composer can target.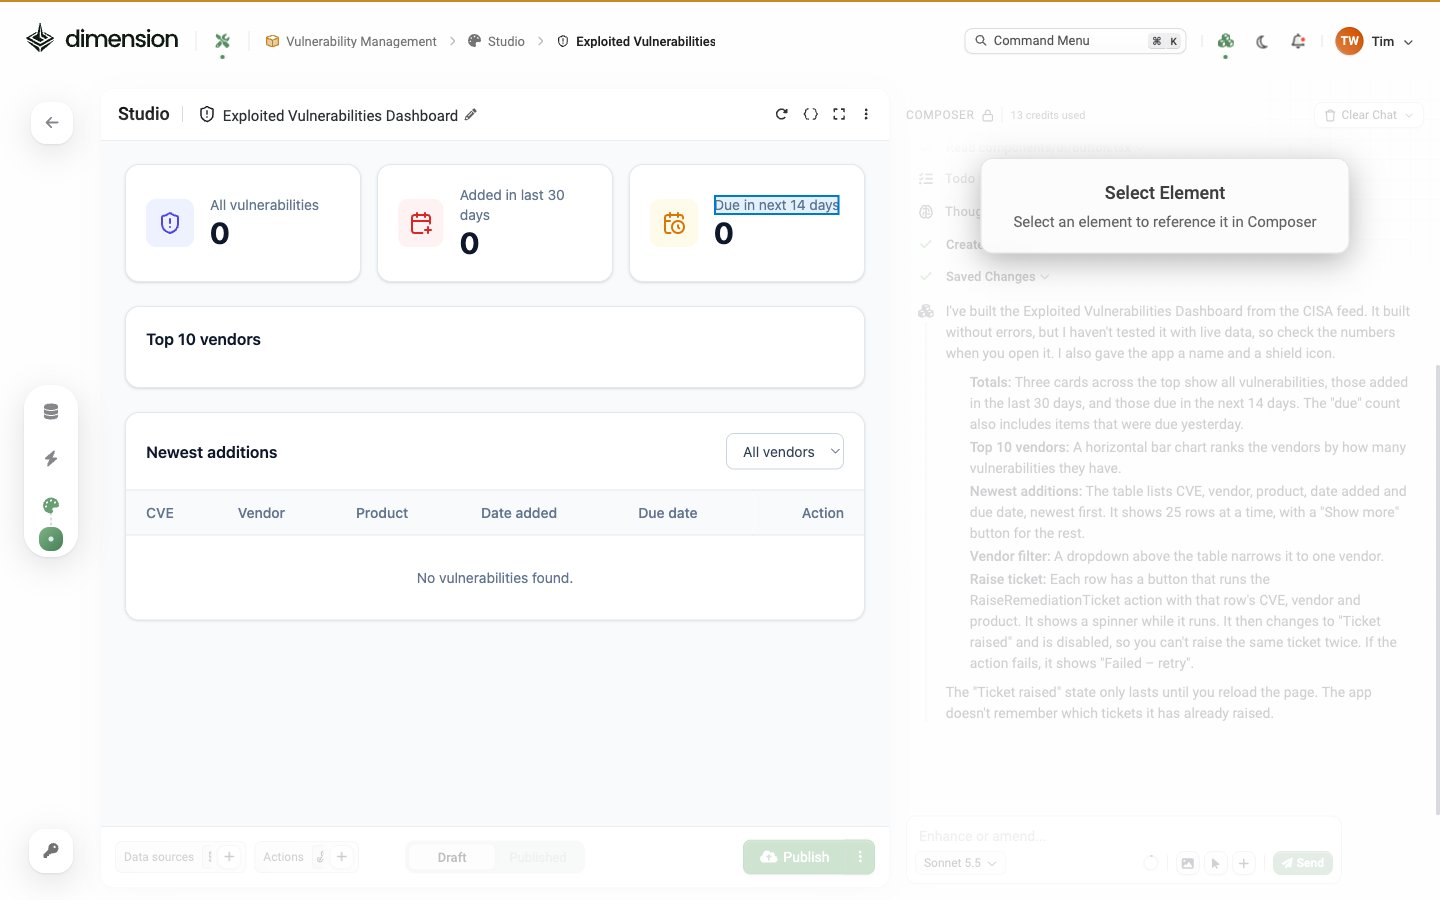
How to use it
1
Enter selection mode
Click the cursor icon (selection arrow) in the Composer footer. A Select Element prompt appears at the top of the Composer pane: “Select an element to reference it in Composer.”Equivalent: ⋯ → Advanced → Inspect Element.
2
Click the element
Click any visible component in the preview — a chart, a metric card, a table row, a button, anything.The click does not trigger the element’s normal click handler — it’s captured by the Inspect overlay.An Element chip appears in the Composer box to show what you picked. Click the × on the chip to drop it.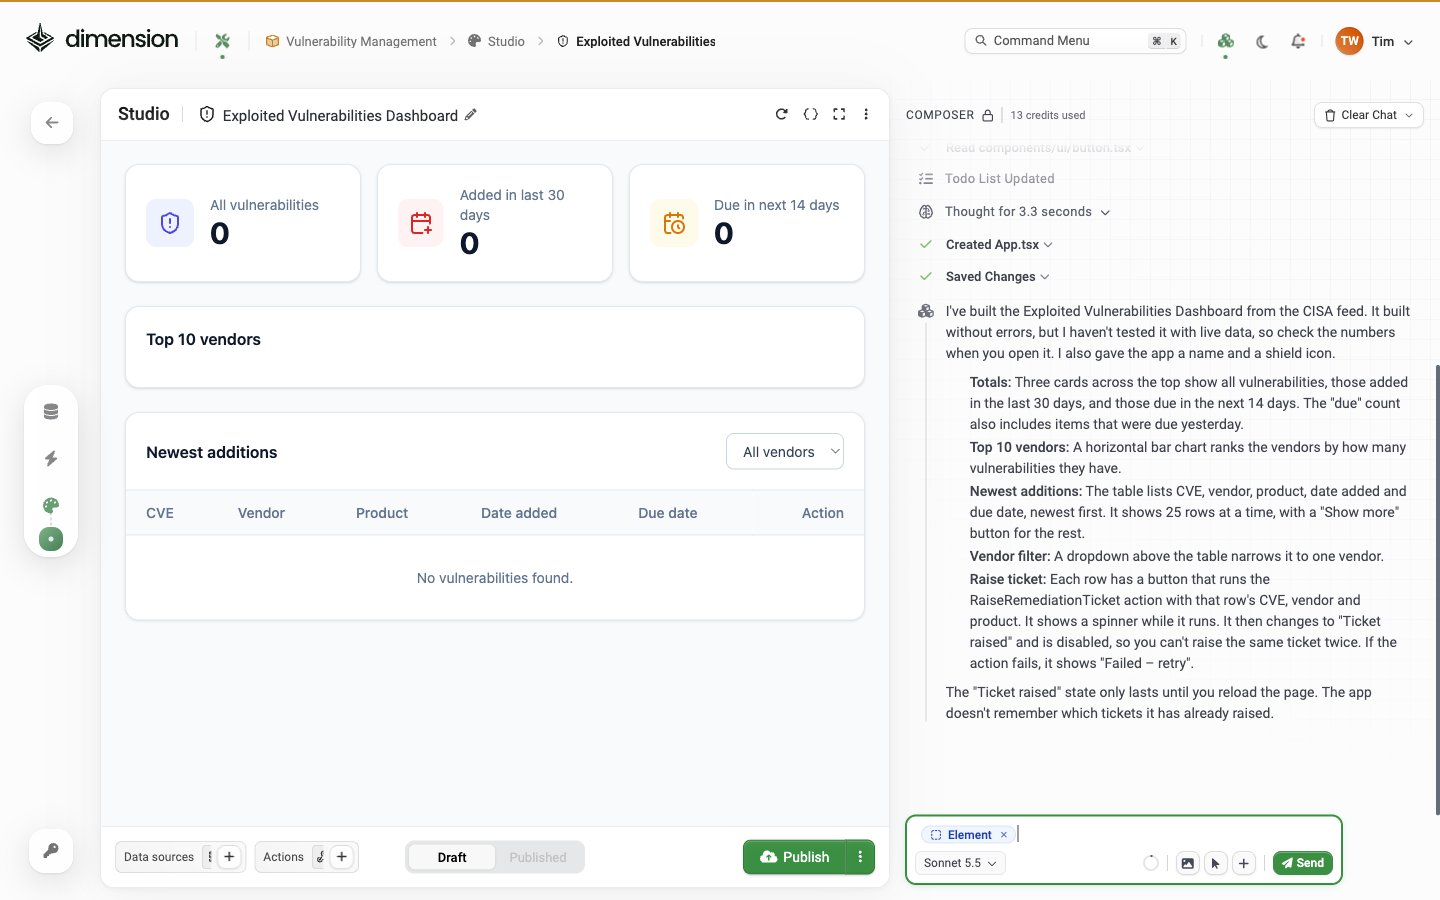
3
Write a prompt that uses the reference
The next Composer prompt automatically refers to the captured element. You don’t need to describe it again.
Patterns that work well with Inspect
When NOT to use Inspect
- Big structural changes — “Rebuild the whole top section” is better described in prose
- Adding new components — Composer can place new components by position; Inspect can only refer to existing ones
- Cross-cutting changes — “Round all percentages to 1 decimal” applies everywhere, no reference needed
Inspect from the Advanced menu
The selection arrow in the Composer footer and ⋯ → Advanced → Inspect Element are the same tool. The Advanced menu route exists for users who prefer mouse paths over toolbar buttons.Limitations
- Inspect is preview-only — clicking elements outside the preview (the toolbar, the Composer panel itself) doesn’t capture
- Iframes inside the preview are treated as opaque — Inspect can target the iframe but not elements inside it
- Dynamically-rendered elements (popovers, dropdowns) need to be open before you can Inspect them
- Disabled in X-Ray mode — switch back to the preview to use Inspect
Restore checkpoint
What it does
Every Composer turn produces a checkpoint — a snapshot of the app’s code right after that response. Restore checkpoint rolls the live Draft back to any checkpoint. This is your primary “undo” mechanism in Studio. Use it whenever a Composer round-trip went sideways.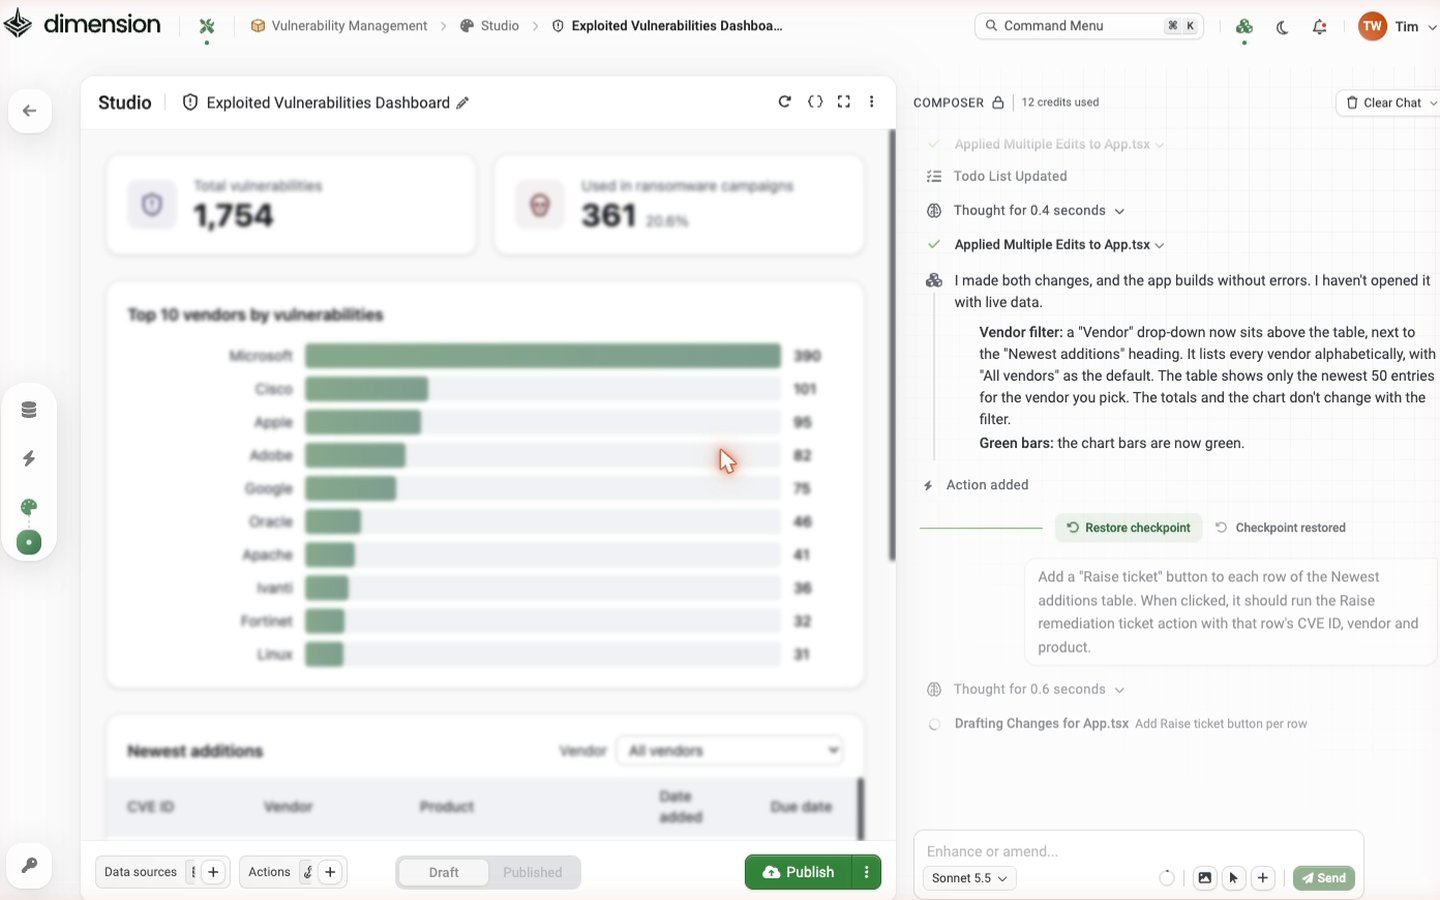
How to use it
1
Find the checkpoint
Scroll the Composer chat to the message you want to revert to. The state restored is the state after that message — so to undo a bad message, click Restore on the message before it.Each completed Composer message has an inline Restore checkpoint action at the top-right.
2
Preview the restore
Click Restore checkpoint. The live preview immediately reverts to the checkpoint state — you see the rollback before it’s permanent.A Confirm checkpoint restore banner appears at the top of the conversation: “Checkpoint restored — confirm to commit the rollback.”
3
Confirm or cancel
- Confirm — replaces the current Draft with the checkpoint state. The preview stays reverted. Chat messages after the checkpoint remain visible in history but no longer apply
- Cancel — reverts the preview back to the latest state; nothing changes
When to use Restore vs ask Composer to undo
Restore is cheaper than re-prompting. It costs 0 AI Credits because no generation happens.
Limitations
- Restore acts on the Draft only — Published is unchanged until you next click Publish
- One restore at a time — confirm or cancel before initiating another
- Restore from later → earlier is one-way confirmed — once committed, you can’t redo unless you re-prompt
- Restore happens per-message — there is no “restore to N minutes ago” by time
Tip — restore early, restore often
Treat checkpoints like git commits. If a refinement isn’t going where you want, restore back two or three turns and try a different prompt. This avoids accumulating layers of half-undone changes.Clear Chat
The Clear Chat button in the Composer header wipes the conversation history but leaves the app code unchanged. Use when:- The chat has gone in circles and you want a clean slate
- You’re handing the app to a teammate and want to remove your debugging dialogue
- You’ve reached a stable point and want to start a fresh iteration phase
Differences at a glance
The full iteration playbook
A frustration-free iteration session looks like this:1
Have a clear target
Decide what you want to change in one or two sentences before opening Composer. Vague prompts produce vague edits.
2
Inspect when possible
For element-level changes, Inspect Component the target first. The prompt becomes a sentence about behaviour, not position.
3
One change per prompt
Big-bang prompts produce big-bang rewrites. Small prompts produce surgical edits and cost fewer credits.
4
Restore freely
If a prompt produces an unexpected change, Restore rather than asking Composer to undo. Restoring is free; re-prompting costs credits.
5
Validate in the preview
After each prompt, look at the preview before sending the next prompt. Drifting changes accumulate quickly if you don’t.
6
Save with Publish
When the Draft is in a known-good state, Publish. Now you have a safety net — even if you mess up further, the Published version is intact.
Common iteration scenarios
Scenario — wrong field in a chart
Scenario — Composer rewrote a working component
Scenario — entire layout went wrong
Scenario — finished a major refactor and want a clean slate
See also
AI Composer
The full Composer toolbar including Inspect Component
Prompt Engineering
Patterns for writing focused prompts that need fewer iterations
Troubleshooting
Recovery paths when Composer doesn’t understand