A Workspace is the isolated container for one project’s worth of work — its own Data Feeds, Actions, and Studio apps live inside it. Workspaces are firm boundaries: an Action in workspace A can’t be invoked by an app in workspace B. Typical layouts:
  • One workspace per business function — SecOps, Identity, Compliance, Asset Management
  • One workspace per environment — Dev, Staging, Production
  • One workspace per user — personal sandboxes for experimentation

Where the switcher lives

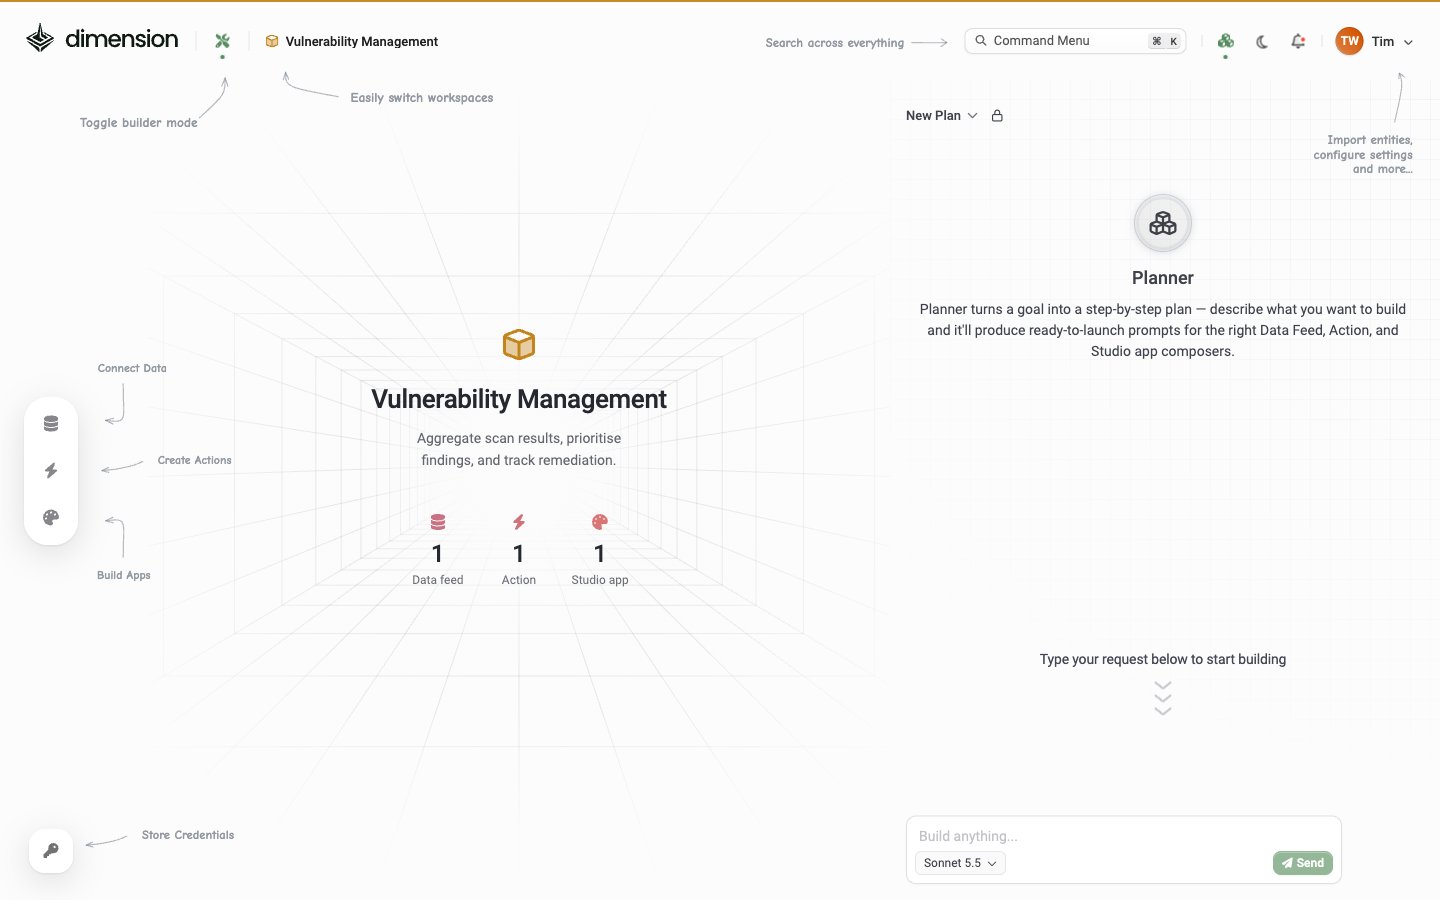
The active workspace is shown as a chip in the header, immediately to the right of the Dimension logo and the Builder Mode toggle: Builder Mode dashboard with the Vulnerability Management workspace chip in the header, a Workspace overview with its description and counters for Data feed (1), Action (1) and Studio app (1), labels pointing to the left rail (Connect Data, Create Actions, Build Apps, Store Credentials), and the Planner panel on the right Click the chip to open the Workspaces panel: Workspaces menu open from the header chip, with a New button and two workspaces, Security Operations and Vulnerability Management (selected) From this panel you can:
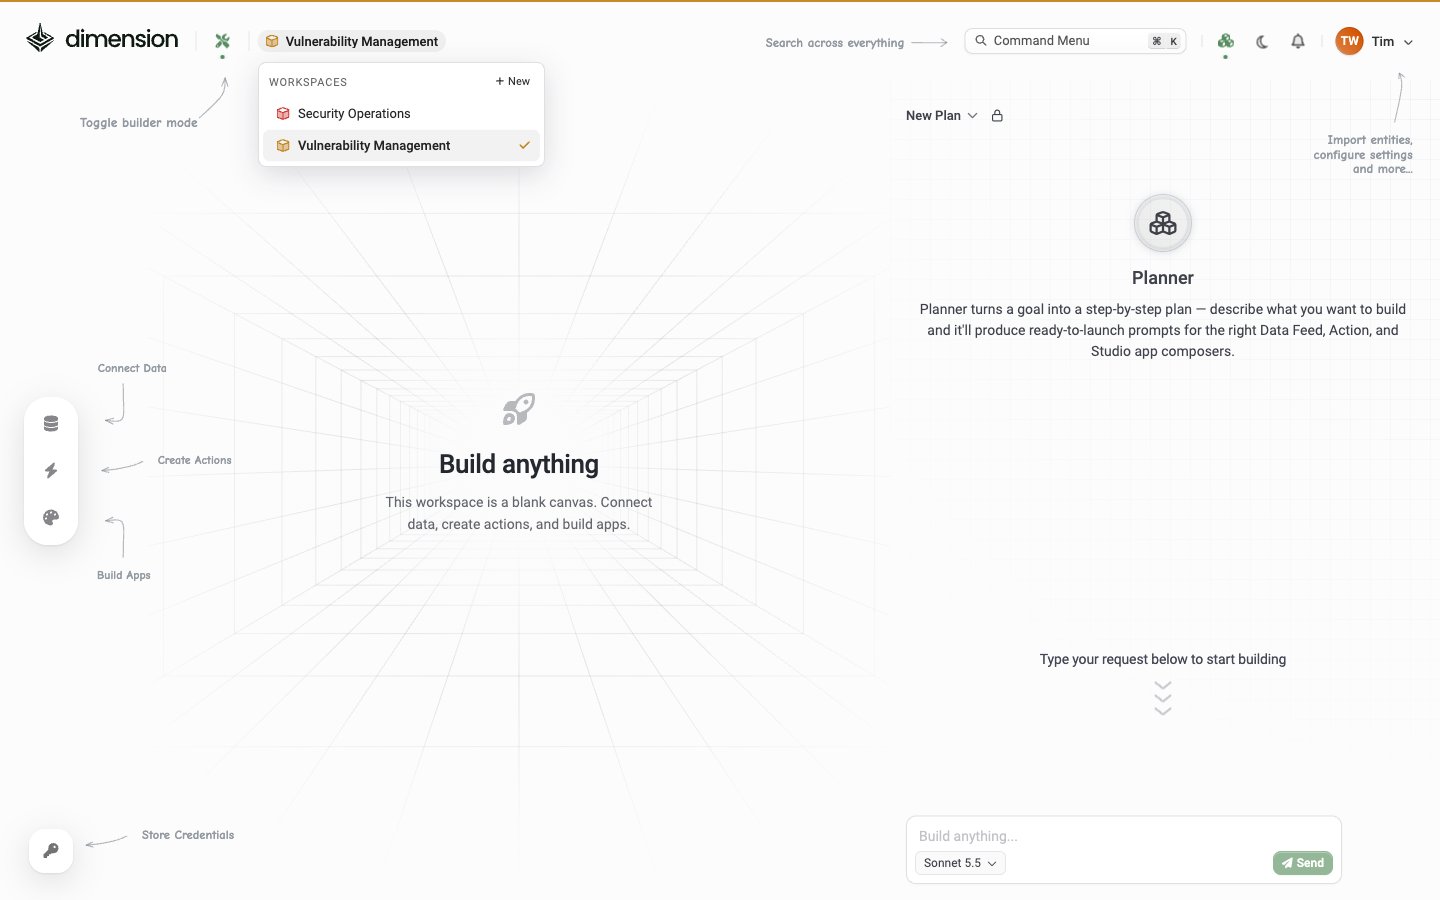
  • Switch — click any workspace card to make it active
  • Create — click + New to open the Create Workspace dialog (covered below)
The workspace switcher is also reachable from the Command Menu (⌘K) → Switch Workspace, which is faster once you have a few workspaces.

Creating a workspace

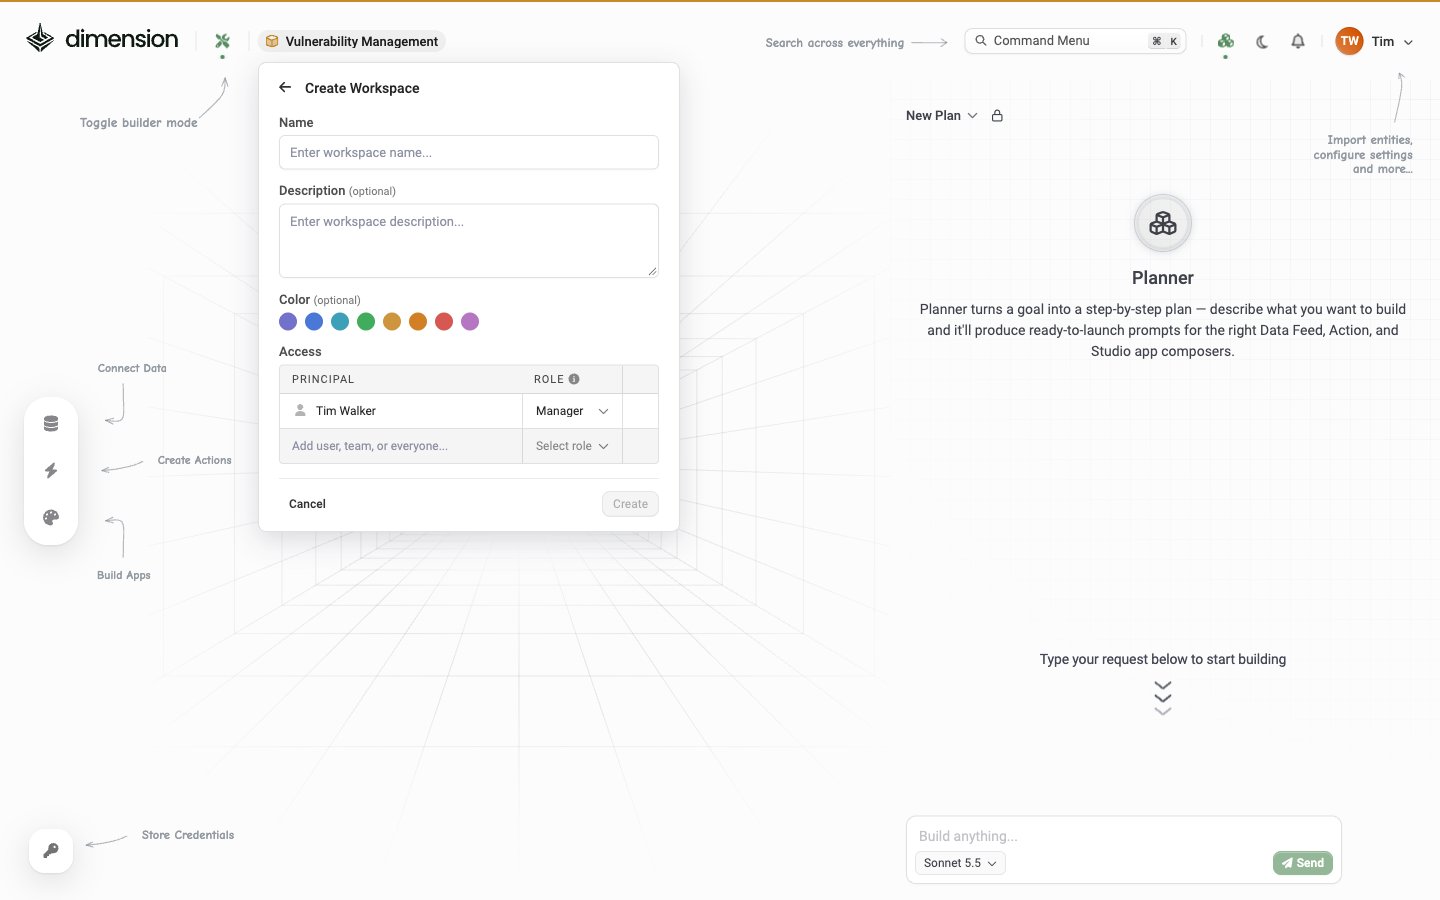
Click + New in the switcher (or Create New… in the Command Menu) and the Create Workspace dialog appears: Create Workspace dialog with Name (placeholder Enter workspace name...), Description (optional, placeholder Enter workspace description...), Color (optional, 8 colour swatches), an Access table giving Tim Walker the Manager role with an Add user, team, or everyone... row, and Cancel and Create buttons Click Create to land directly inside the new workspace.
Access
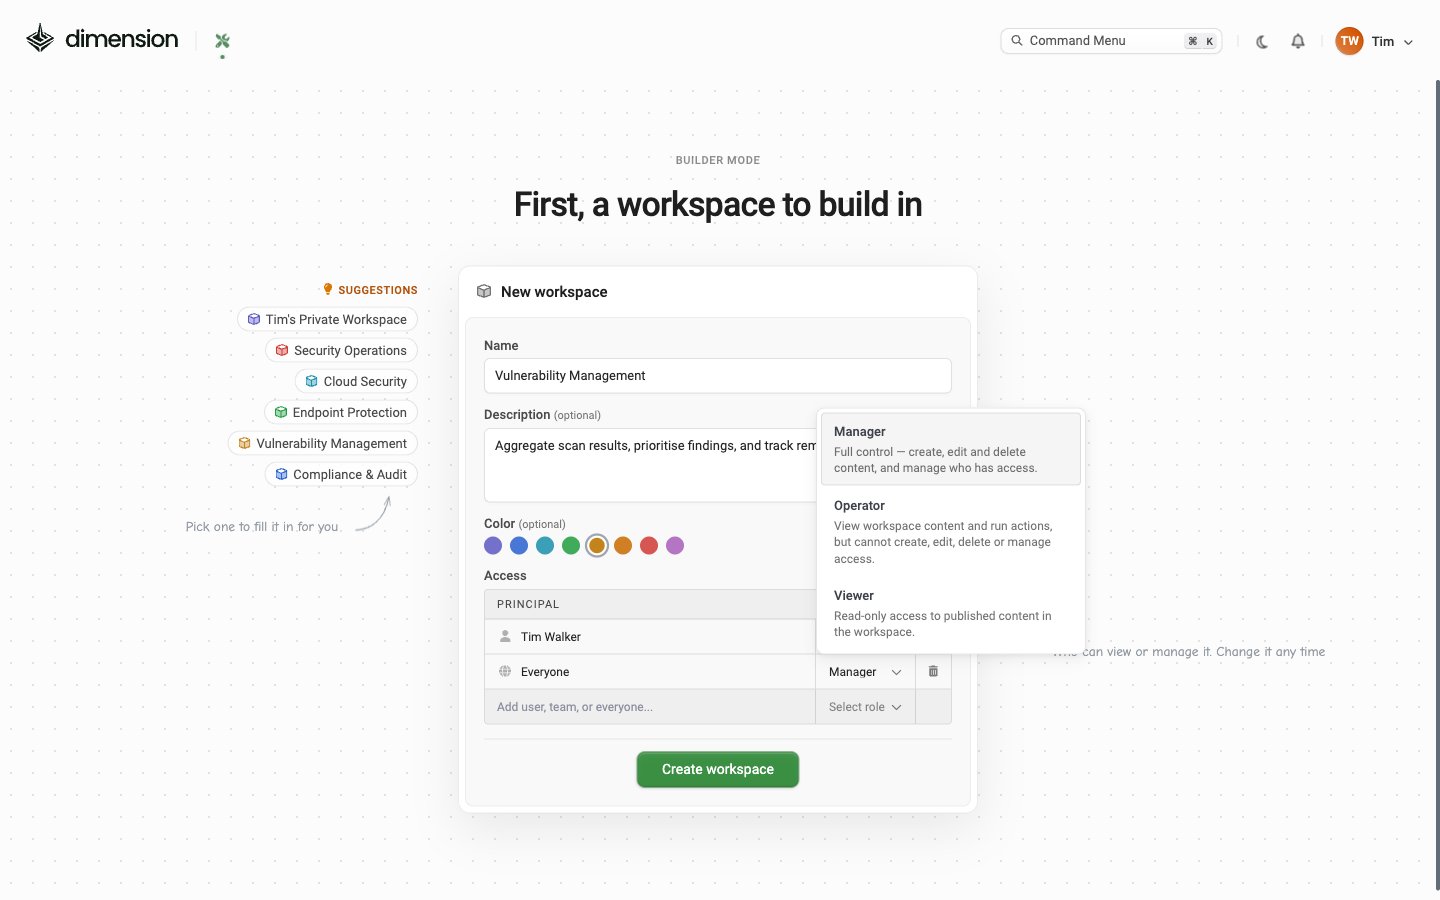
Role dropdown open in the workspace Access table, showing Manager (Full control: create, edit and delete content, and manage who has access), Operator (View workspace content and run actions, but cannot create, edit, delete or manage access) and Viewer (Read-only access to published content in the workspace) The Access table lists who can use the workspace. Use the Add user, team, or everyone… row to add a person, a Team or everyone in your tenant, then give each one a workspace role: Leave yourself as the only entry to keep a workspace private while you experiment.

What lives inside a workspace

Each workspace’s overview screen (the page you land on after switching) shows the workspace name, its description and three counters: Click any counter to jump to that list for the workspace. A new, empty workspace shows Build anything instead: “This workspace is a blank canvas. Connect data, create actions, and build apps.”

The left rail

The icons on the left of every Builder Mode screen take you to each part of the workspace: Each list has a + New button. For actions, New asks which type to create: Webhook, Email or Table Write.

Planner panel

The right-hand side of every Builder Mode overview is the Planner — a “build anything” textbox that turns a high-level goal into a multi-step plan with ready-to-launch prompts for each Composer.

Workspace credentials

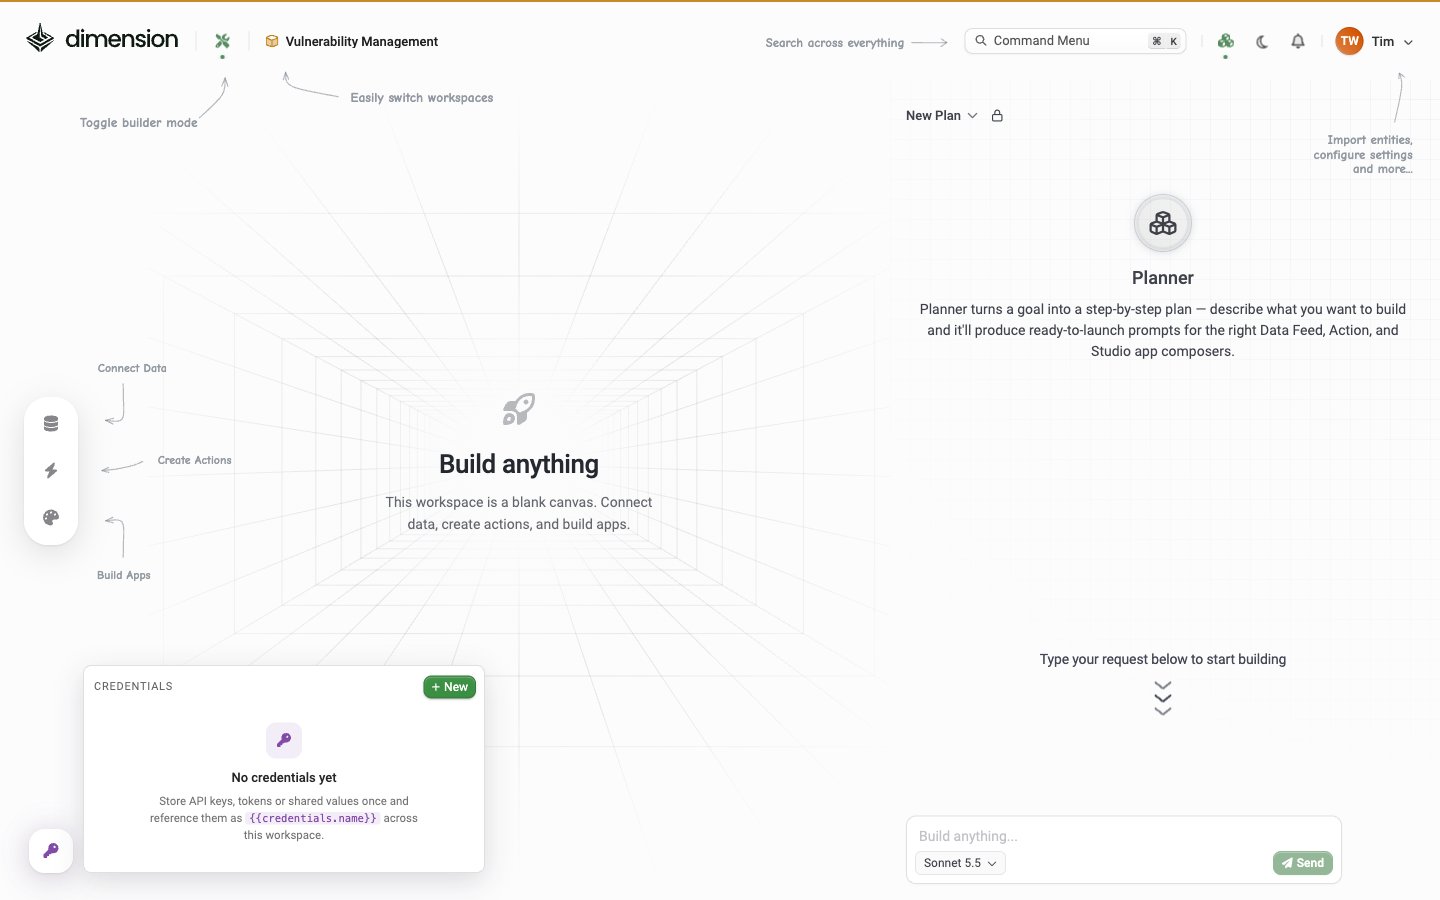
Credentials hold API keys, tokens and other shared values once, so data feeds and actions in the workspace can use them without pasting the value into each one. Click the key icon at the bottom of the left rail to open them. Credentials panel opened from the key icon in the left rail, with a New button and the empty state No credentials yet: Store API keys, tokens or shared values once and reference them as {{credentials.name}} across this workspace Click + New to add one: New credential form with a Name field (e.g. graphToken) referenced as {{credentials.name}}, a Value field with the Secret toggle on and the note Encrypted at rest, the value is never shown again after saving, and Restrict usage turned on with Allowed URL options URL prefix, Exact URL and Any URL The form also lets you limit the HTTP methods and where the credential can be used.
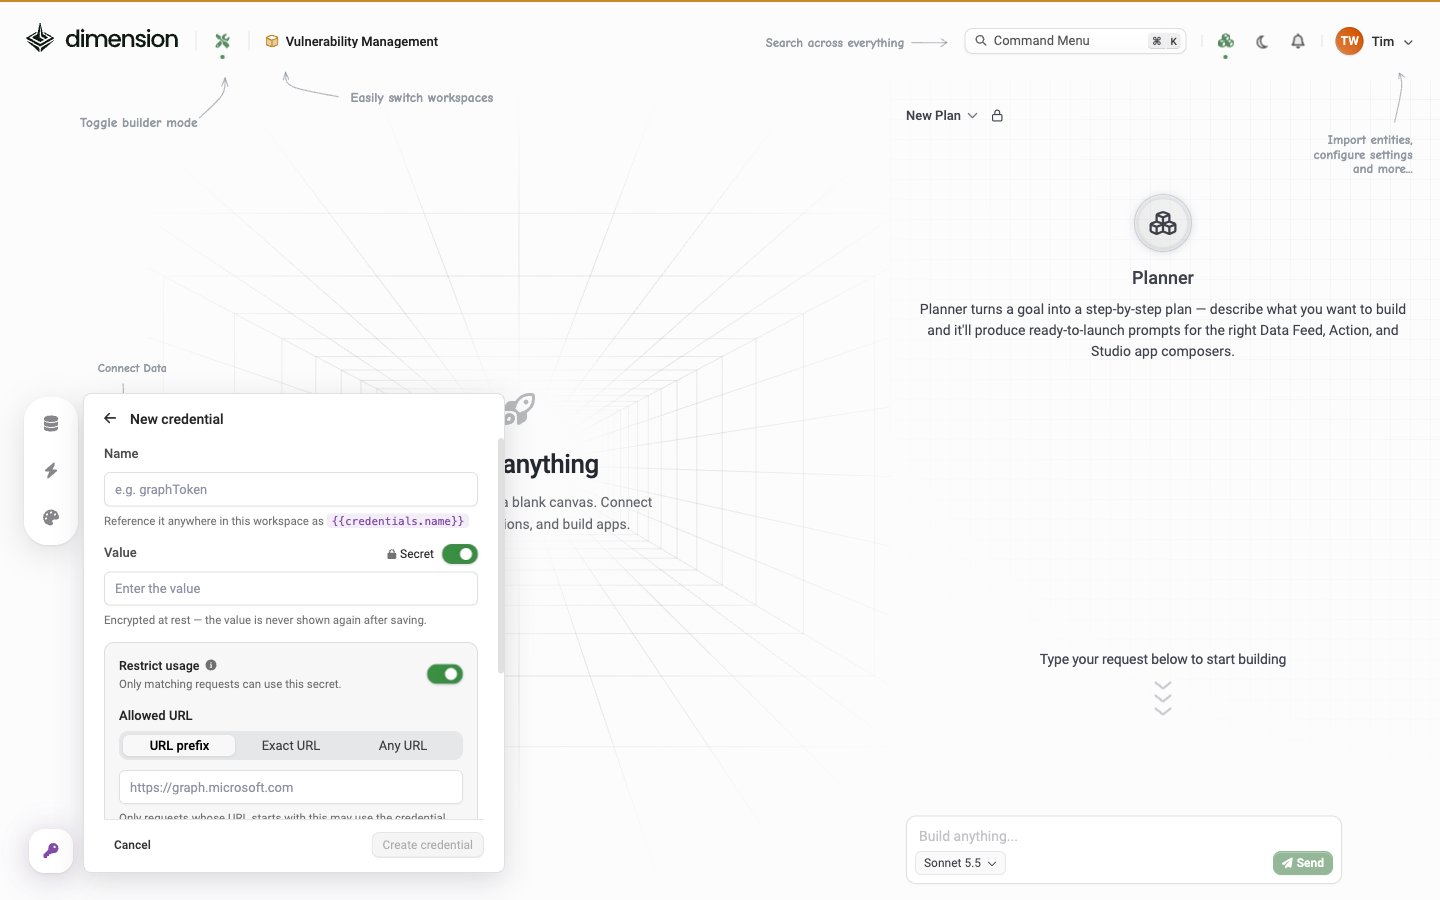
Turn on Restrict usage for every secret. If a credential is limited to its API’s URL prefix, a mistyped or AI-generated request can’t send it anywhere else.

Renaming, recolouring, deleting

Migrate apps to a different workspace via ⋯ → Advanced → Migrate in the Studio editor before any destructive workspace operation — the operation pulls Data Feeds and Actions the app depends on along with it.
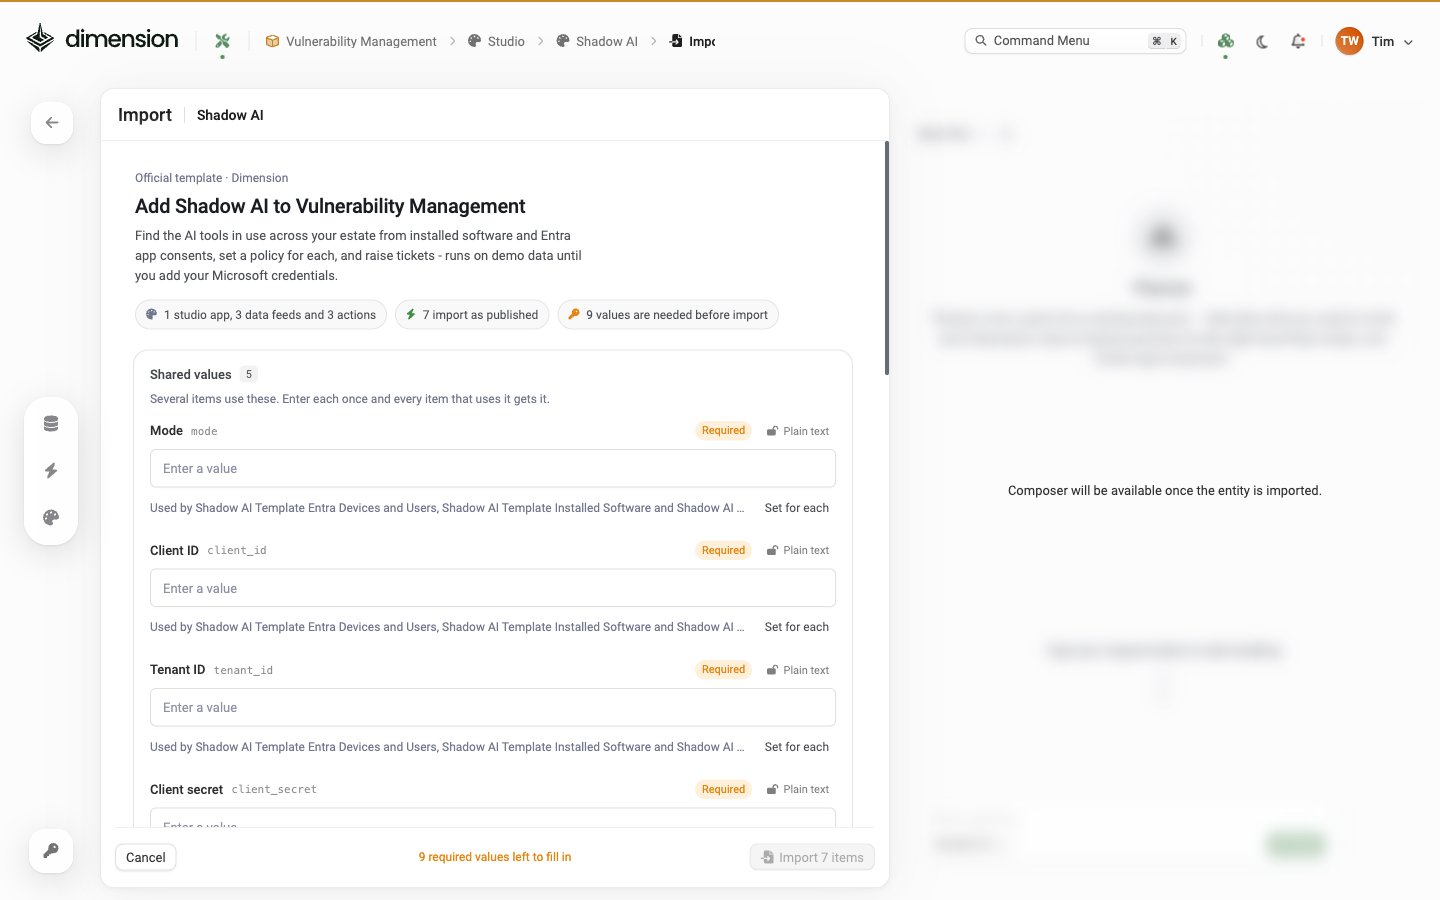
Ready-made apps, data feeds and actions live in the Gallery on each list page (for apps: Build Apps → Gallery). Preview one, then click Import to add it to the active workspace along with everything it needs. Import screen for the Shadow AI official template: Add Shadow AI to Vulnerability Management, with chips for 1 studio app, 3 data feeds and 3 actions, 7 import as published, and 9 values are needed before import, a Shared values section asking for Mode, Client ID, Tenant ID and Client secret, and an Import 7 items button that stays disabled until the required values are filled in The import screen lists what will be added and asks for any values the template needs, such as your Microsoft credentials. Shared values are entered once and used by every item that needs them.
Workspace isolation

Hard rules:
  • A Data Feed in workspace A cannot be referenced from an app in workspace B
  • The same applies to Actions and Apps
  • Cloning an app via ⋯ → Clone creates the clone in the current workspace
  • Migrating an app (via ⋯ → Advanced → Migrate) moves the app and all its dependencies into the target workspace
See Exporting, Sharing & Cloning for the migration flow.

Common patterns

Build apps in a Dev workspace that only you can access until they’re stable, then Migrate them into a shared Production workspace.
Create one workspace per security function — SecOps, Vuln Mgmt, Identity, Compliance. Each owns its own Data Feeds (e.g. Jira instance, ServiceNow instance) and Actions.
Spin up a workspace only you can access, prototype freely, throw it away when done. AI Credits, Records, and Apps quotas count across all your workspaces, so test runs do count against your billing period.