

App menu (⋯)
In the Studio editor, the ⋯ icon in the top-right reveals: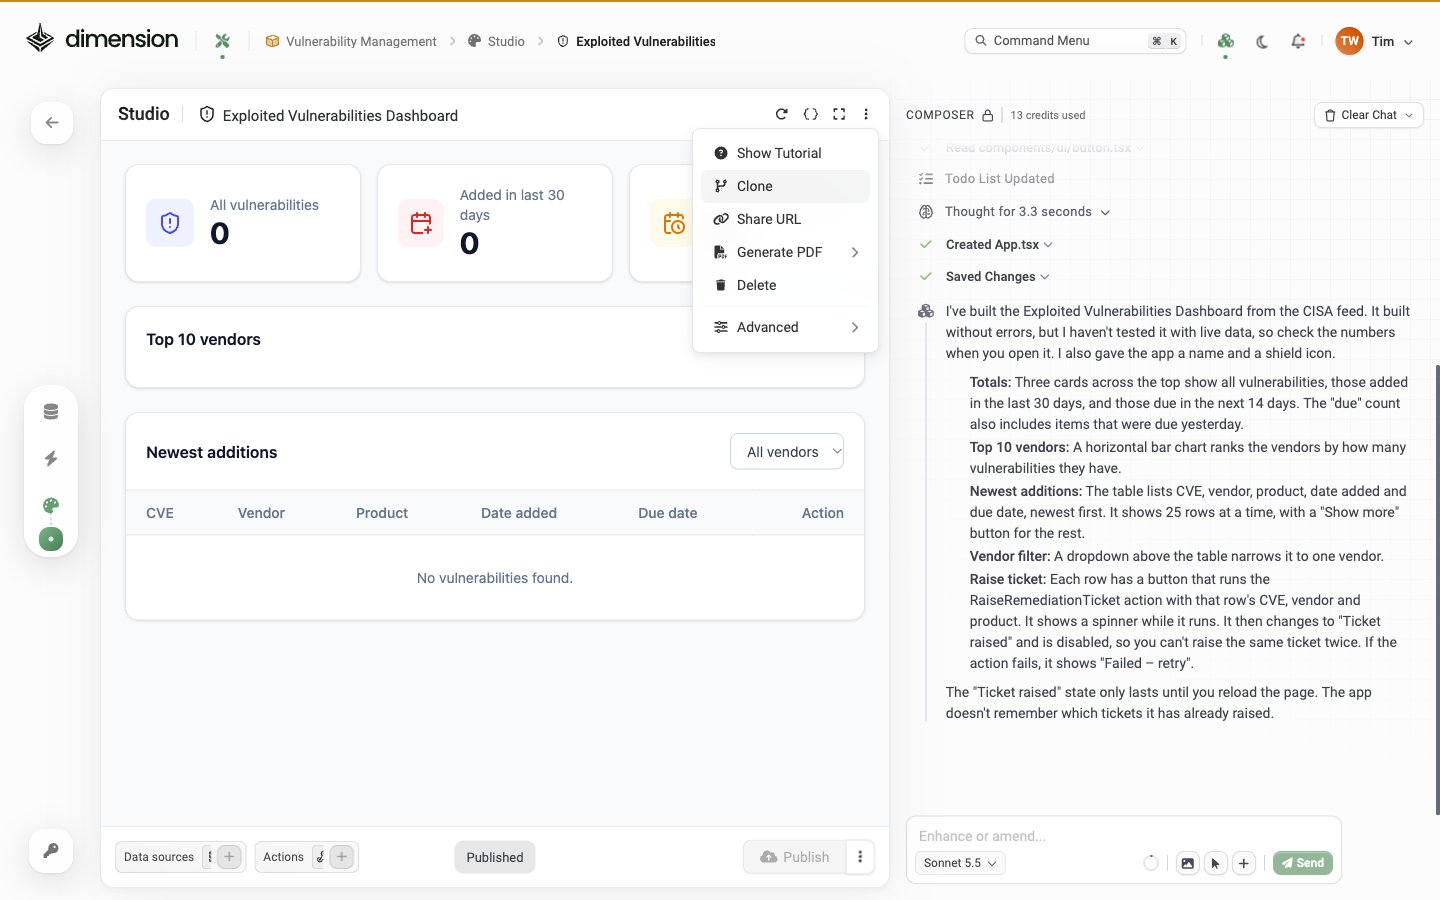
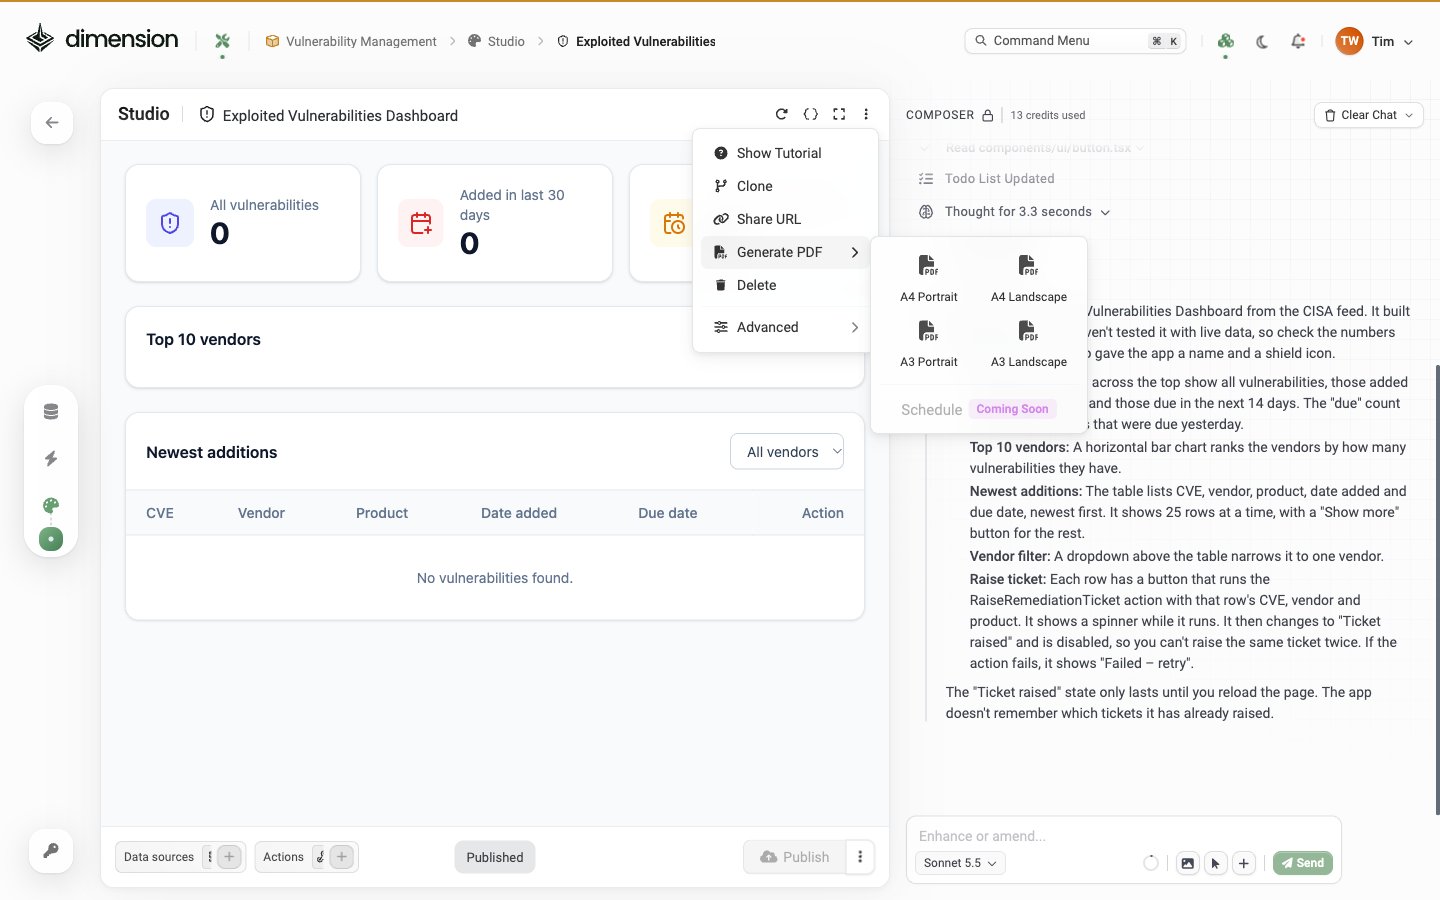
Generate PDF
PDF export supports four standard formats:- A4 Portrait
- A4 Landscape
- A3 Portrait
- A3 Landscape
Sharing
Two ways to share:- Share URL (from the ⋯ menu) — opens a dialog with a customizable short URL.
- Right-click any app tile in Builder Mode — gives you Open in new tab, Copy link, Launch and Edit, among others.
Share URL is a customizable slug
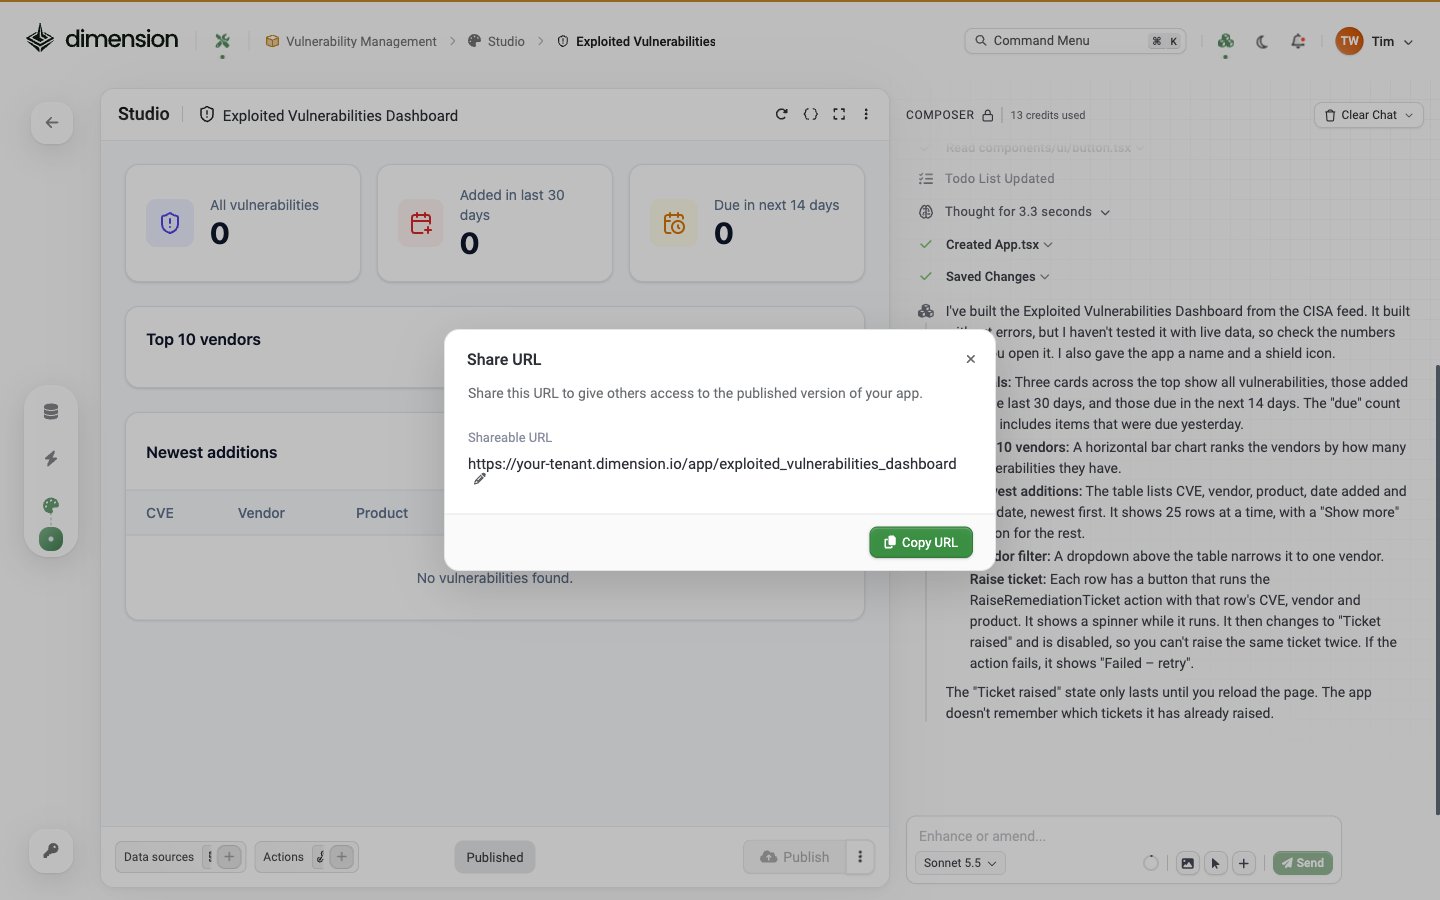
exploited_vulnerabilities_dashboard). Click the pencil icon to edit it — make it memorable (e.g. compliance-dashboard, device-inventory). The slug must be unique within the tenant.
Share URL is also a Shortcut. Publishing an app automatically creates a Shortcut record in Settings → Shortcuts with the slug. Editing the URL here updates the same Shortcut.
Cloning
From the ⋯ menu, Clone creates an editable copy of the app. The clone starts as a draft you fully own — modify it freely without affecting the original. Cloning is the recommended starting point when an existing app is close but not quite right.Draft vs Published
Every app has two states tracked by the editor:- Draft — your unpublished changes; visible only to you while you build
- Published — what everyone with access sees
Advanced → Inspect Element
Inspect Element puts the editor into selection mode. Click any element in the live preview and Studio captures a reference to it, ready to drop into the next Composer prompt — useful for prompts like “remove this”, “make this the same height as the chart next to it”, or “duplicate this in the panel below”. The same tool is available as the selection arrow icon in the Composer footer.Advanced → Export
Export downloads the complete application package — source code, dependencies list, and a README with run instructions. The exported app has no ThreatAware dependencies and can be run anywhere. Before it downloads, the Export dialog lets you choose what goes in:- Dependencies — the data feeds and actions the app uses, each with a checkbox
- Export Settings — Include Composer Conversation, Include Key Value Store, Include App Thumbnail and Include Unencrypted Variables
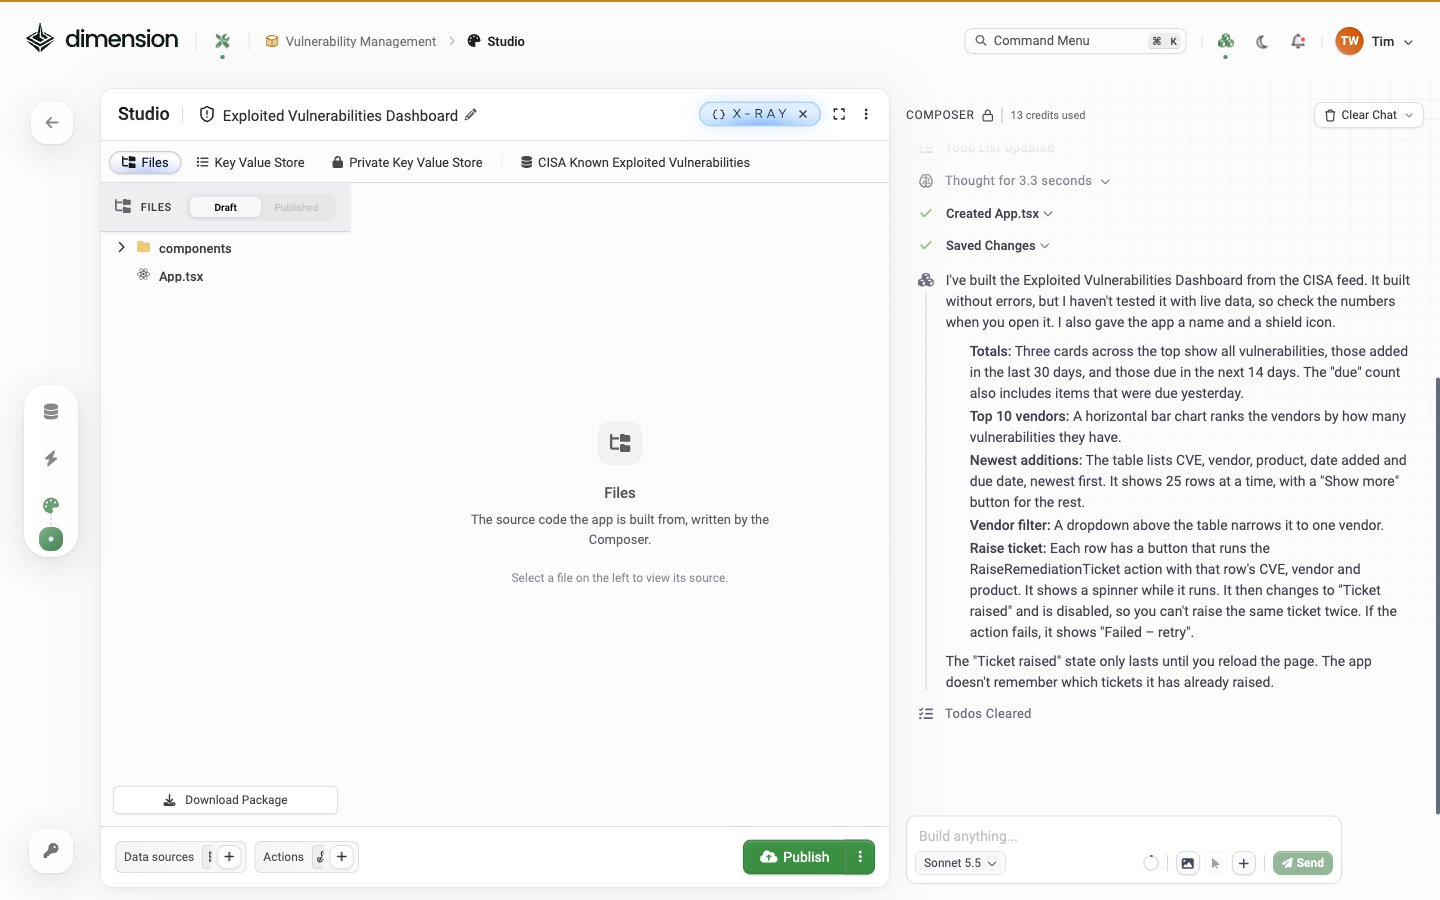
< > icon in the editor header) gives you a file-tree explorer for the same source code. There’s a Download Package button at the bottom of X-Ray, and you can toggle between Draft and Published versions of every file.
Advanced → Migrate
Migrate moves an app — including its data feeds and actions — between Dimension workspaces. Use it to promote an app from a Private workspace into a shared one, or to copy an app between development environments.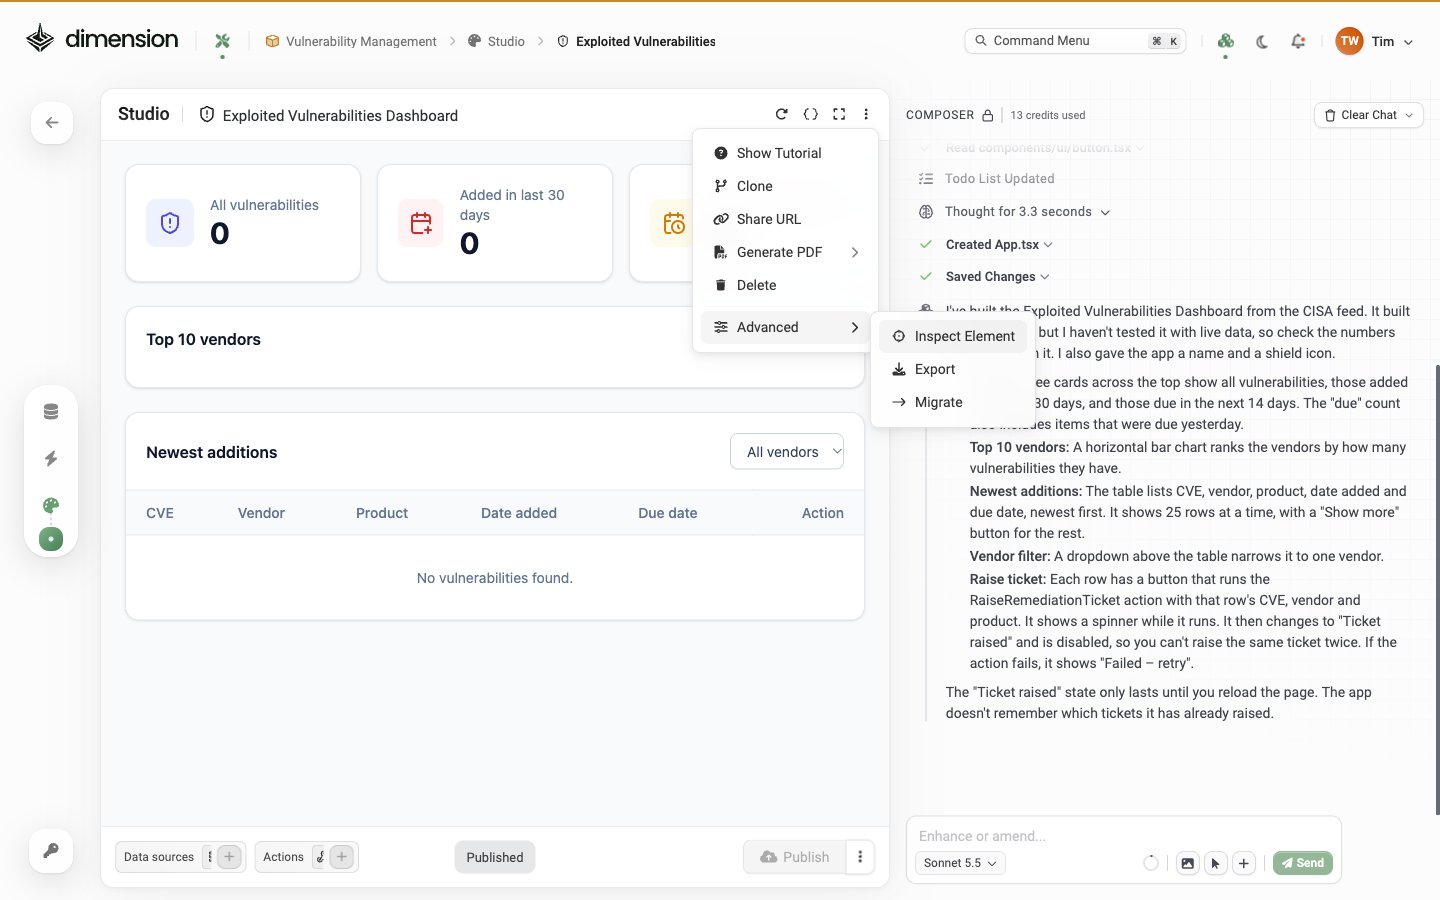
Workspace access
Apps follow the access of the workspace they live in. Each workspace has an Access list of people, Teams or everyone in your tenant, each with a workspace role:
Set access in the Create Workspace dialog. See Workspaces.